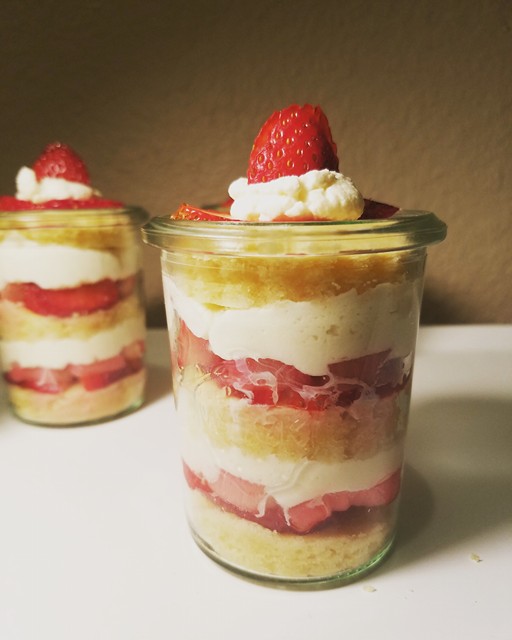
Jarred Strawberry Rhubarb Cake
Submitted by Melissa Castle
About the cook: I have loved baking since I was a little girl, but never knew what it meant to me until I left for college and had my first break down. I was stressed going to school full time and working full time that I felt like I was losing myself. I was losing my happiness and one day I decided to bake some cupcakes and found my passion. As time went on I had people tell em it was a horrible idea, but in the end I knew baking was the one thing that made me happy. The one thing that I could always turn to if I became stresses. The one thing I knew I wanted to do for the rest of my life.
About the dish: Sour from the rhubarb, sweet from the strawberry, dry from the cake, and creamy from the whip cream. Cute, small, and prefect for any after dinner treat, or whenever you feel the need to eat one of these.
National Origin: English
Serves: 12
Estimated Time: 1 to 2 Hours
Ingredients:
- Cake
1 cup unsalted butter - softened
1 cup granulated sugar
3 eggs
1/4 cup heavy whipping cream
2 cups all-purpose flour
1/2 teaspoon salt
1/2 teaspoon vanilla extract
- Berry Filling
4 stalks of rhubarb - sliced into 1/2 inch piece
2 tablespoons granulated sugar
12-16 ounces of strawberries - thinly sliced
- Cream
1 1/2 cups heavy whipping cream
1-2 tablespoons granulated
1 teaspoon vanilla
Preparation:
Prep:
Lay a piece of parchment paper onto a cookie sheet, then butter and flour the parchment paper. In addition, preheat the oven to 350 degrees F.
– Step 1 – Start the Cake
In a large bowl, cream the 1 cup of butter until fluffy – about 3 minutes.
Add in the 1 cup of sugar and mix for another 3 minutes, or until fluffy, and then set aside.
– Step 2 – Mix Egg and Cream
In a small or medium bowl, whisk together the 3 eggs and 1/4 cup of heavy whipping cream.
– Step 3 – Mix Dry Ingredients
In a small bowl, mix together the 2 cups of flour and the 1/2 teaspoon of salt.
– Step 4 – Mix the Three Bowls Together
Pour half of the wet ingredients and half of the dry ingredients into the butter and sugar mixture and mix well.
Then mix the second half of the wet and dry ingredients into the the butter and sugar mixture until completely combined.
– Step 5 – Add the Vanilla
Add the 1 teaspoon of vanilla extract to the batter and mix well for another 3 minutes.
The batter will be thick, but that is ideal.
– Step 6 – Spread the Batter Out
Spoon the cake batter onto the prepped cookie sheet and spread the batter out evenly.
This can be difficult (a pain in the ass really) because the batter is thick, but just keep spreading it out until it is even.
– Step 7 – Bake
Bake the cake at 350 degrees F for about 15 minutes, or until the cake has baked and when poked it springs back up or until a toothpick comes out clean.
Let the cake cool completely until needed.
– Step 8 – Bake the Rhubarb
Place the chopped rhubarb into a baking pan and mix with 2 tablespoons of granulated sugar.
Cover the rhubarb with tinfoil and bake in the 350 degree F oven for about 8 minutes or until the rhubarb is soft, but still keeps its form.
Once baked, let the rhubarb cool completely.
– Step 9 – Make Whipping Cream
Place the 1 1/2 cups of heavy whipping cream and 1 teaspoon of vanilla extract into a medium sized bowl.
Whisk on medium-high speed until soft peaks start to form and then add 1 tablespoon of sugar until soft peaks have formed.
Add more sugar if the cream is not sweet enough – but the cream should not be super sweet, just a hint of sweetness.
– Step 10 – Cut the Cake
Taking a cookie cutter or biscuit cutter, cut circles out of the cake and place them on a cooling rack until needed.
Check the size of the jar that you want to use before cutting random circles.
– Step 11 – Start Stacking
Press one cake circle to the bottom of the jar.
Add a layer of sliced strawberries and a layer of rhubarb to the top of the cake.
Then add a layer of cream.
Repeat.
Add a layer of cake, then a layer of strawberry and rhubarb, and then cream.
Keep filling the jar until the jar is full, but end with the cake on top.
Add decoration if desired.
– Step 12 – Eat!
Share these treats or eat them all to yourself, I won’t judge.